
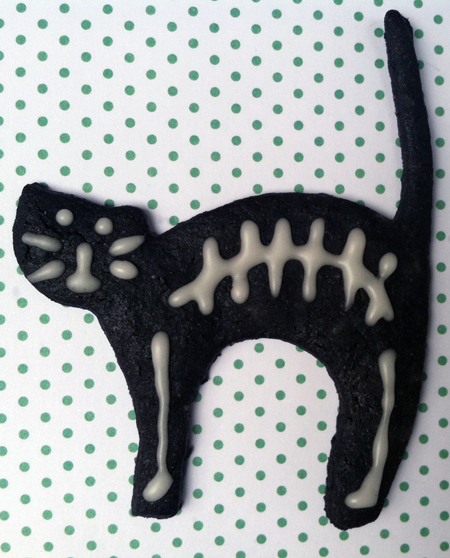
How’s that for a black cat? My secret: King Arthur Flour’s black cocoa. Use the same cocoa (and the recipe below) for homemade Oreos!
I love baking cookies with Harry. Love watching him learn to scoop flour into the measuring cup, to stir the dry ingredients gently so that they don’t fly out of the bowl, to roll out dough and place the cutters carefully. And then, after the interminable wait for baking and cooling, the decorating. In the past I’ve always handled the icing and let Harry add the sparkly bits. But now that he’s all of five years old, it’s time for him to do some real work.
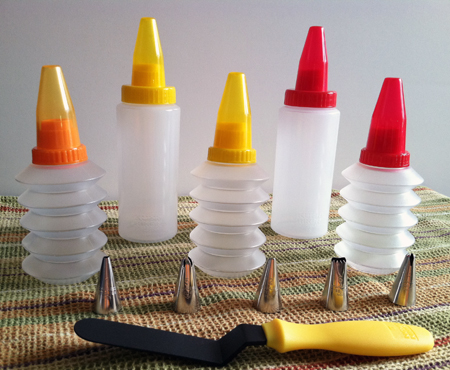
No, I don’t expect him to wield a pastry bag—heck, I can barely handle one myself. Maintaining a steady squeeze while directing the tip requires a steadier hand than I have most days, and it’s out of the question for Harry. His hands are just too small. Instead, I let him loose with this nifty Kuhn Rikon decorating set, provided to us courtesy of the King Arthur Flour people. It’s a set of squeeze bottles, folks! Cute little accordion bottles, the perfect size for kids’ hands. With decorating tips. And an offset spatula, too. Check it out:
Harry loved it, and so did I. We baked up a batch of Halloween cookies (also Cars 2 cookies, vehicle cookies, star cookies, and letter-H cookies) and were both able to put icing exactly where we wanted it, with no muss, no fuss.
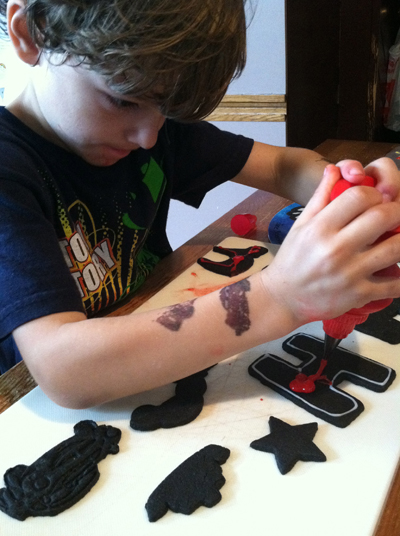
What concentration! I outlined the “H,” and Harry flooded the insides. He also did that very fine-looking cat you see under his left elbow, the one with blood-red whiskers. The rest were eaten before I could photograph them.
Look. My skills as a decorator still leave something (OK, a lot) to be desired. But with this nifty little kit, I could almost fool you into thinking that I know what I’m doing.
Adapted from The King Arthur Flour Cookie Companion
Makes several dozen cookies, depending on the size of your cutters
1 1/2 cups all-purpose flour, plus more for rolling
6 tablespoons Dutch-processed cocoa
6 tablespoons King Arthur Flour’s black cocoa
1/2 teaspoon salt
1/2 teaspoon baking powder
3/4 cup (1 1/2 sticks) unsalted butter, softened
1 cup plus 2 tablespoons sugar
1 large egg
1 tablespoon water
1 teaspoon vanilla extract
- In a medium bowl, whisk together the flour, cocoas, salt, and baking powder, then set aside.
- In a large bowl or the bowl of a stand mixer fitted with the paddle attachment, beat the butter until color lightens. Add the sugar and beat again, until thoroughly combined. Add the egg, water, and vanilla, and beat for 2 to 3 minutes, until the mixture is quite light and fluffy. Add the flour mixture. Do not overmix.
- Divide the dough into 2 halves, and place each on a large piece of plastic wrap. Form into flat disks, and wrap tightly. Refrigerate for at least 4 hours and up to several days—the dough will be too soft to work with otherwise.
- When you’re ready to bake, preheat the oven to 325°F with the racks set in the upper and lower thirds. Grease or line 2 baking sheets.
- Generously flour your clean work surface. Remove one dough disk from the fridge and roll it out to about 1/8-inch thickness—don’t go too thin or you’ll have trouble moving them. Move the dough frequently to prevent it from sticking to the work surface. Use cutters to form whatever shapes you like. Carefully pull away excess scraps, then transfer to the baking sheets. Brush away any obvious flour.
- When you’ve filled both trays, bake for 17 to 18 minutes. The dough is so dark you won’t be able to tell they’re done based on visuals. The cookbook says they’re probably done when you can smell them—this proved true for me. If you get even a whiff of scorching, remove them immediately. Let them cool for a minute or two on the sheets, until they’re firm enough to move, then transfer to racks to cool fully.
Basic Cookie Icing
Adapted from Cooking Light
1 tablespoon water
1 teaspoon meringue powder
1 tablespoon low-fat milk
1/4 teaspoon vanilla extract
2 cups powdered sugar
Food coloring of your choice
This recipe doesn’t make a ton of icing, so if you’ll be using more than 2 or 3 different colors I’d recommend doubling it.
- Combine the water and meringue powder in a medium bowl, whisking until smooth. Add the milk and vanilla. Add the powdered sugar, and stir until completely smooth (you may want to use a spatula initially, then switch back to the whisk).
- Divide into portions to be colored. Add coloring, little by little, until you’ve reached the desired shade. Transfer to squeeze bottles, add tips, and decorate.
MAKE BABY FOOD: While these are safe for older babies, they’re, y’know, sugary. Save for special occasions only.