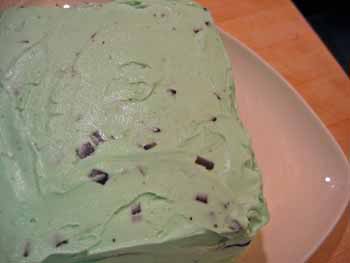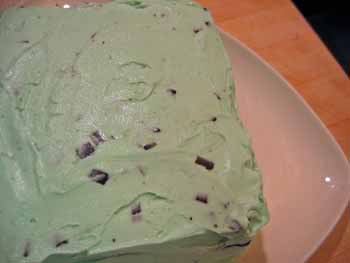
Mint and chocolate are the perfect couple. She, a flirty pale green, enlivens his deep, somewhat predictable flavor. He, brown and strong, grounds her airiness, providing ballast lest she float away on a cool breeze. Now, I could drag this metaphor out and wrap it around my relationship with S, but that might be pushing things. While I’ve been known to flirt, I am neither green nor airy; S, strong, brown-haired fellow that he is, is hardly predictable. But we both love us some mint chip ice cream, which is the theme of today’s program—more specifically, the Mint Chip Ice Cream Cake I made for S’s birthday last weekend.
What kind of downmarket celebration is this? you may be asking. He requested Benihana and an ice cream cake? Maybe S is trying to tell me to lighten up on the highfalutin foodie stuff. Perhaps, but in reality I like to get down with some fine junk food as much as he does, maybe more. Let’s face it: this stuff is fun.
Initially, S requested a Carvel cake, and any of you who grew up on the East Coast know why: the crunchy bits! The secret weapon that saves many an out-of-control kiddie birthday party, the Carvel ice cream cake’s main reason for being is those little nuggets of god-knows-what, layered in there only to break up the smooth white custard. They’re what makes it a cake, and not just a pile of hardened soft-serve in the shape of a whale. So when S made his request, it didn’t take long for us to realize that what he really wanted was the crunch. In the end I was free to make any kind of ice cream cake I wanted, as long as it had those little bits.
I feared that I wouldn’t be able to secure a supply of the little nibs. It seemed to me that if Carvel was willing to part with the secret to their ice cream cakes without the actual ice cream, it might well decimate their business. Not to mention the fact that Carvel feels like such a corporate entity these days that I was hard-pressed to think of an outlet where the cakes didn’t come from HQ–where the individual ingredients might actually be on hand. But find one I did, in Upper Montclair, New Jersey, when I was visiting a friend. It was a stand-alone shop, with dingy cases and worn signage—it’s probably been there for forty years or more, without being renovated much after the seventies. Before we went in, my friend and I strategized about how to ask for the crunchies: should I be up-front, and tell them I was planning to use their product in my homemade ice cream cake? Or should I pretend that it was just to top a bowl of previously-bought Carvel? As it turns out, I needn’t have worried—there were pre-filled plastic cups of the stuff right there on the counter, along with the sprinkles and chopped nuts. I bought two, and only ended up using one in the recipe that follows—so now we’ve got a nice little treat to spruce up lowly bowls of ice cream for the foreseeable future!
This recipe takes a little forethought—first you bake a deep, dark chocolate cake, which must cool completely before being used in the final assembly (I made it the day before). And there’s lots of freezer time in between layers, so the assembly itself takes what feels like hours—but for much of that time you’re just waiting for the newly added layer to set so you’re free to do other things. It’s worth it, for sure—the end result is pretty spectacular, and getting there is not at all difficult (even the cake-baking is Easy with a capital “E”). Do eat it within a day or two, though, since the cake isn’t quite as yummy once it’s frozen solid.
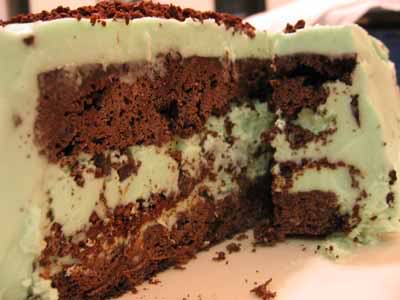
Now look at this picture:

Isn’t that just gorgeous? Seriously, who can think of a better combo than mint and chocolate? Not I, that’s for sure.
Mint Chocolate Chip Ice Cream Cake
Adapted from Best of Martha Stewart Living: Desserts
Serves 10, with a nice 8” square snack cake leftover
1 layer Dark Chocolate Cake (recipe follows)
½ gallon mint-chocolate chip ice cream [I used Healthy Choice, since I couldn’t find our favorite Turkey Hill Low Fat]
½ to 1 cup Carvel crunchies
Trim chocolate cake to six inches square [you get to eat the scraps—not to mention the spare layer—while you assemble, yum…]. Slice the cake horizontally, making two thin layers, and put one layer on your serving plate. If your ice cream isn’t soft, microwave it a little, about 20 seconds, and stir it around until it’s spreadable. Using an offset spatula, spread a nice thick layer of ice cream over the top of the cake. Sprinkle the crunchy bits liberally over the top—the idea is to completely cover the ice cream, making another layer of texture. Press gently all over the top of the cake, and place it, along with the rest of the ice cream, in the freezer for 20 minutes.
Remove the cake and the ice cream. Stir the ice cream to soften again. Using the offset spatula, spread another thick layer of ice cream over the cake. Place the second cake layer on top. Place the cake, and the remaining ice cream, in the freezer for 20 minutes.
Remove the cake and the ice cream. Using a long serrated knife, trim a hair from all sides of the cake, to give you an even surface to work with. Stir the ice cream one more time—this is the last step. Spread the remaining ice cream over the top and sides of the cake, completely covering it, as if it were icing. Return the cake to freezer, and freeze until completely hardened.
Dark Chocolate Cake:
Nonstick cooking spray
1 ½ sticks unsalted butter, melted
2 cups all-purpose flour, plus more for pans
1 ½ cups sugar
¾ cup unsweetened cocoa [I used Dutch]
½ t. salt
1 ½ t. baking powder
¾ t. baking soda
3 large egg whites, room temp
1 t. pure vanilla extract [I also added ½ t. mint extract, which was a nice touch but far from necessary]
1 1/3 cups strong, hot coffee
Heat oven to 325. Spray two 8-inch square baking pans with cooking spray. Line with parchment, and spray again. Flour the pans, and set aside.
In the bowl of an electric mixer fitted with the whisk attachment, place all the ingredients except the hot coffee. Mix on low speed until combined, about 1 minute. Slowly add the coffee. Mix until smooth, about 1 minute. Divide batter between pans; smooth tops with an offset spatula.
Bake until a cake tester inserted into the middle of each cake comes out clean, 25 to 30 minutes. [Be sure you’re really testing well—I thought both my layers were fully baked so I put them on a rack to cool, but half an hour later I noticed that one half of one of the layers had collapsed a bit—it was still raw in the middle! I popped it back in the oven for twenty more minutes, and all was well.] Transfer to a wire rack to cool. Cover tightly with plastic wrap or aluminum foil until ready to use.
NOTE: This cake is really yummy on its own, and the way I’ve adapted the recipe you’ll have an entire 8” layer left over. What could be better than that?
