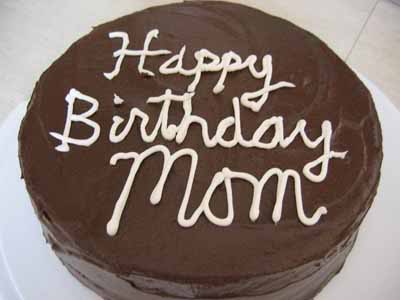
My mom’s birthday was on Inauguration Day. Between the blizzard and my family’s busy schedules, the Official Celebration will finally happen later today. While we kids would’ve been perfectly happy to take Mom out—and I offered to host the party here, too—my mother’s ideal birthday involves having her entire family come to her home, where she and my dad feed us ungodly amounts of food, the television is always on, and my nieces have full access to an assortment of toys kept there for their pleasure. Heck, I’m just glad Mom allowed me to bake the cake! As for the flavor: well, chocolate is a given in my family. There is no other way to celebrate.
And now, for the challenge: My parents and two of my brothers keep kosher. Mom’s menu for the evening was fleishig (meat), so the dessert has to be pareve—without dairy. Swapping margarine for butter is an easy fix, but many of the lighter recipes I’d like to try, to keep my own eating within reasonable WW limits, involve milk, yogurt, or sour cream. No, no, and no. I gave up on the idea of a light cake, and focused on finding something I could make pareve. No surprise, I found the perfect recipe in Moosewood Restaurant Book of Desserts, one of my Old Reliables. Dark Chocolate Layer Cake, it’s called, with coffee frosting. As always, I played with the recipe a little: subbing egg whites for whole eggs (my one attempt at lightening), adding a bit of bittersweet chocolate and coffee to super-chocofy the cake batter, and adding cocoa to the frosting to make it mocha—I was a teeny bit concerned about how the little ones would take to a frosting that was too strongly coffee-flavored.
I haven’t had a piece of the cake yet, but I have tasted the scraps (see Debbie’s Frosting Tips, below, and you’ll know where the scraps came from…) and the frosting, and Oh. My. God. this cake is The Bomb. I was forced to put the scraps on a plate in S’s office, since otherwise I would’ve nibbled my way through all of them (and god forbid we throw them away—it tastes too good to waste!). Verrrrry moist, luxuriously deep, and the coffee is more a suggestion than an overt presence. Coffee boosts chocolate’s flavor, so I suspect that my tweaks have made this even more chocolaty than the original recipe.
Can’t wait to see what the family thinks of this cake. I think it’s a winner. (And Mom, if you’re reading, you’ve spoiled your own surprise!)
Weight Watchers readers: the recipe builder says this is 9 points per serving, for a 16-serving cake. On the one hand, I laugh at the idea that this cake serves 16, but on the other hand I didn’t use all the frosting, and I left behind quite a bit of cake when evening out the tops. I’m planning to eat a small piece and count it as 6 points.
Dark Chocolate Layer Cake with Mocha Frosting
Serves 16, according to the recipe, but I don’t live in Fantasyland. In my world, it serves 12
For the cake:
½ cup strong brewed coffee, hot
1 cup boiling water
1 oz. bittersweet chocolate
¾ cup dutch cocoa powder
2 cups all-purpose flour
1 ¼ t. baking soda
1/8 t. salt
1 cup butter or margarine, at room temperature
1 1/3 cups packed light brown sugar
4 large egg whites
1 T. pure vanilla extract
For the mocha frosting:
5 to 6 T. strong brewed coffee
1 t. instant espresso powder
3 ½ cups powdered sugar
1/3 cup dutch cocoa powder
½ cup butter or margarine, at room temperature
Make the cake:
Combine coffee and water (I usually just measure them into the same cup). Put bittersweet chocolate in a small bowl, and pour about ½ cup of the hot liquid over it and set aside. Put cocoa powder in a medium mixing bowl and add a bit of the coffee-water, whisking to make a paste. Whisk in the rest of the liquid. Stir the chocolate-coffee-water to make sure all the chocolate is melted, and then add it to the cocoa mixture. Whisk it all together and set aside to cool.
Preheat oven to 350. Butter and lightly flour two nine-inch cake pans (I use cooking spray instead of butter).
In a small mixing bowl, sift together the flour, baking soda, and salt, and set aside. With an electric mixer, cream together the butter or margarine and brown sugar in a large mixing bowl. Add the egg whites, two at a time, beating well after each addition. Mix in the vanilla. Add half the flour mixture, then the cocoa mixture, then the rest of the flour mixture, beating after each addition. Batter should be thick and almost fluffy.
Divide the batter evenly between the two cake pans. Bake for 25 to 30 minutes, until a cake tester or thin skewer inserted into the center comes out clean. Cool the layers in the pans for about 5 minutes, then turn them out onto racks to cool completely.
Make the frosting:
Dissolve the espresso powder in the coffee and allow to cool. Whisk together the powdered sugar and cocoa. In a large mixing bowl, cream the butter and sugar-cocoa mixture with an electric mixer. Gradually add the coffee, beating well until the frosting is a good consistency for spreading.
Debbie’s Frosting Tips:

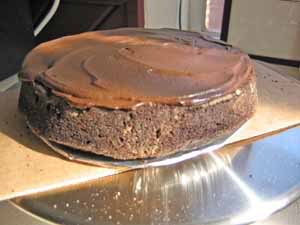
• If your baked layers are domed on top: using a long serrated knife, slice just enough off the top to even them out. Bonus: you get to eat the scraps!
• If you’ve tasted the scraps and they seem too dry: make a simple syrup (heat equal amounts of sugar & water until sugar is dissolved, and let cool). Brush this liberally over the top of the cake layers. Let it sit for a little while to absorb the syrup before frosting. (This particular cake shouldn’t need it, though)
• If you’re frosting the cake on the same plate you’ll use for serving, tear four long strips of wax paper, each about 4” thick. Overlap them on the plate, making a large square that covers where the edges of the cake will be. You’ll remove them later, and all your drips and smudges will magically disappear, leaving behind a clean serving plate.

• If you plan to move the cake after frosting, trace the bottom of the cake pan on a piece of cardboard and cut it out. Cover with aluminum foil. Place this on the surface where you’ll be decorating, and when you’re done you’ll have a sturdy bottom to pick up. (I also placed a wide “plank” of cardboard underneath the round, so I’d have something to grab onto when the time came.)
• Put a dollop of frosting directly on the plate or foil-covered round—this will keep the cake from sliding.
• Place the first layer upside-down on the plate.
• Carefully brush away all loose crumbs.
• Using an offset spatula, plop a good-sized dollop of frosting roughly in the center of the cake, and spread it to the edges. Place the second layer upside-down on top, and brush off loose crumbs. If you see gaps around the edges between the two layers, fill them with frosting. (Think of the lucky person who gets a slice with an extra smoosh of frosting in it!)

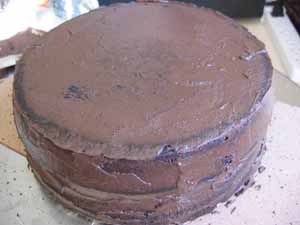
• Put a thin sealing layer of frosting all around the cake. It’s ok if you can still see the cake through the frosting—this is to lock in any crumbs that may still be adhering, and to give you a smooth surface to work with for the final frost.
• Let the cake sit for fifteen minutes or so, until the frosting is set.

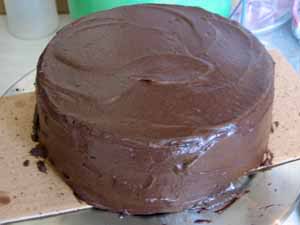
• Frost the cake, top first then sides, using the offset spatula.
• If you’ve used them, carefully pull out the strips of wax paper, and you’re good to go.
