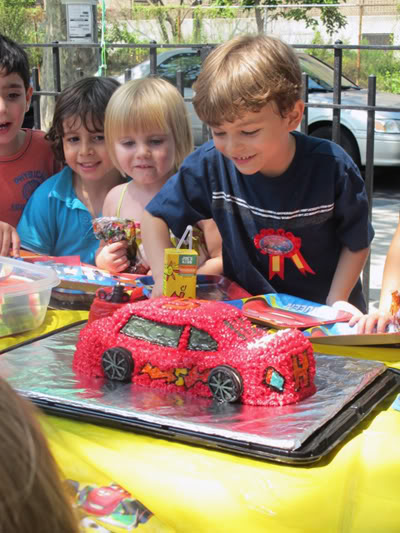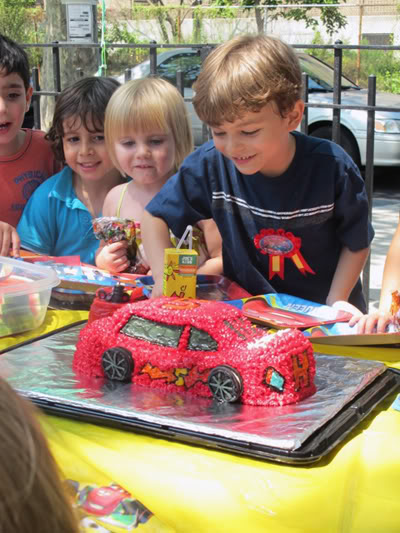
Photo courtesy of Sue M.
Harry’s 5th birthday party was, oh, a month ago. It’s high time I tell you all about the most important part: the cake. This is the third in an annual series, in which Harry requests a cake that is far beyond my skill set, and I get in way over my head attempting to make him happy. It’s a gripping tale, and so lengthy I’m telling it in two parts, but here’s a spoiler to match the photo: He loved it.
Regular readers will recall last year’s red-frosting-is-infuriating 3D fire truck cake, and 2009’s harrowing Handy Manny fondant experience. So when Cars 2 reinvigorated Harry’s obsession with McQueen, Mater, et al, I was planning to keep things simple. A sheet cake, perhaps, with a store-bought cake topper.
You know that didn’t happen. No, I decided to go whole-hog and make a 3D McQueen. I thought that by avoiding fondant and using those hard-earned lessons about making red frosting, I could pull it off.
While on deadline to approve the copyedited manuscript of my cookbook.
What an idjit.
That’s right, it was another to-the-wire, can-I-really-do-this, why-did-I-say-I’d-do-this night before the party. Actually, it was the entire day before the party.
The cake itself should’ve been easy—I’d scored a 12-inch square cake pan at a stoop sale recently, which meant I could bake one giant cake and cut it up. Harry requested a chocolate-chip cake, so I planned to add chips to a yellow cake recipe. Problem was, I’ve never found one I really like. So I did the smart thing: I asked my friend Sara Schneider of Sara Bakes Cakes, who’d already shared with me her foolproof frosting recipe. She responded with what she calls her “best yellow cake”—and she’s absolutely right. The recipe is killer. My test run (a half-recipe, enough for a single 9-inch pan) came together beautifully. Even the addition of chopped chocolate, tossed with flour to prevent it from sinking to the bottom, went off without a hitch. The trouble came when I tried to bake a double recipe in that big-ass pan.
I did my research. I knew I’d need to make some adjustments to ensure even baking—most sites recommend using a heating core. That’s a metal cup you stick in the center of a large cake pan and fill with batter—the idea is, the metal conducts heat to the center of the cake so everything bakes up evenly. Once it’s cool you remove the core, and plug the hole with the little nugget of cake that you’ve baked inside it. Did I do that? No. I kept Googling, and learned that folks who regularly bake these jumbo cakes often prefer a flower nail.
It conducts heat, but costs less and doesn’t leave a big divot in the center of the cake. I went with one of those, as well as a set of cake strips
to wrap around the outside of the pan. I also planned to bake at a lower temperature, to keep the edges from burning before the center had baked. Together, those adjustments would prevent excessive doming and yield a thoroughly baked cake. See? I knew what I was doing.
My friends, I don’t know where I went wrong. Perhaps I got the one flower nail that doesn’t actually conduct heat. But my cake took forever to bake. After 70 minutes at 325°, with the top a lovely golden brown but the insides still lava-liquid, I pleaded for help on Facebook. Two pros talked me off the ledge: Sara and Denise Vivaldo, a food stylist friend who happens to have written a book all about DIY weddings.I lowered the temp to 275° and tented the cake with foil—finally, 85 minutes after it went into the oven, it was done.
That’s when I realized my cooling racks were too narrow for a 12-inch cake. After a minor freak-out, I MacGuyvered two of them together with twist-ties and crossed my fingers that, once it had cooled a bit, the cake would actually come out of the pan.
That’s when I noticed the center of the cake was collapsing. Fast.
Stay tuned for Part II of this ridiculous saga, when I actually get to the part where I, y’know, make a Lightning McQueen cake. Meanwhile, here’s Sara’s yellow cake recipe. It’s rich and vanilla-y and super-moist, and it’s the only yellow cake recipe you’ll ever need.
While you (eagerly?) await the conclusion of my tale, I’d love to hear your own tale of kid’s birthday cakes gone wrong. How’d you handle it?
Sara’s Best Yellow Cake
Adapted from Tate’s Bake Shop Cookbook
Sara says:
This is my #1 go-to vanilla cake recipe, there really is nothing better, but I guess I’m a little biased. I’ve included weight measurements if you’re so inclined. It’s definitely dense, not light and fluffy like a store-bought cake. Sour cream keeps it moist for a very long time.
If you try it and don’t love it, I will fall down off my chair.
For two 9-inch pans, or 36ish cupcakes:
2 1/2 cups all-purpose flour (320 g)
1/2 teaspoon baking soda
1 teaspoon baking powder
1 1/2 teaspoon salt
1 cup unsalted butter, at room temperature
2 cups sugar (400 g)
4 large eggs
1 large blob of vanilla bean paste, or approx 2 teaspoons of good vanilla
1 cup sour cream (8 oz) NOTE: I did my test-run with plain nonfat yogurt, since I was too lazy to hit the store. And it worked just fine! The texture felt a little low-fat, so for the real thing I went with full-fat sour cream.
For a 12 x 12 x 3-inch pan:
5 cups all-purpose flour (640 g)
1 teaspoon baking soda
2 teaspoons baking powder
1 tablespoon salt
2 cups unsalted butter, at room temperature
4 cups sugar (800 g)
8 large eggs
4 teaspoons of good vanilla
2 cups sour cream (8 oz)
Preheat the oven to 350°F. Grease your baking pan(s) and line the bottom with parchment.
- In a mixing bowl, whisk together the dry ingredients and set aside.
- In a large bowl or the bowl of a stand mixer fitted with the paddle attachment, cream together the butter and sugar until light and fluffy. Add the eggs one at a time, scraping down the sides of the bowl often. Add the vanilla.
- Add half the dry ingredients to the mixture. Add all the sour cream, and follow with the remaining dry ingredients. Pour batter into your pan(s) until no more than 2/3 full.
- For a 9-inch pan, bake for 25 to 30 minutes, until a cake tester inserted in the center comes out clean. For cupcakes, test after 18 minutes. And for a monster 12-incher, bake at 275 and start testing after 75 minutes.
To make a chocolate chip cake:
Toss 1 cup of mini-chips (regular chips are too large) or finely chopped chocolate with 2 tablespoons of flour for a single recipe, or double that for the giant version. Stir into the batter just before you pour it into the pan(s).
